I’m amazed by how much water we could keep on site. I finally installed a 55 gal surplus food drum. One 1/2 hr thunderstorm filled it up!
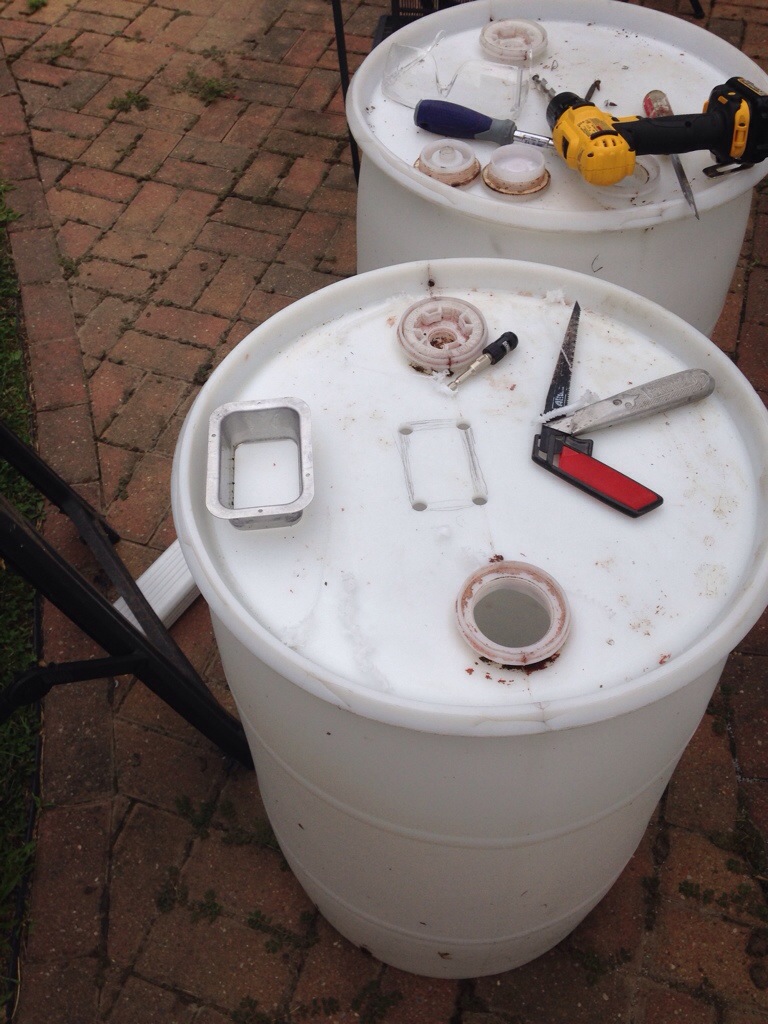
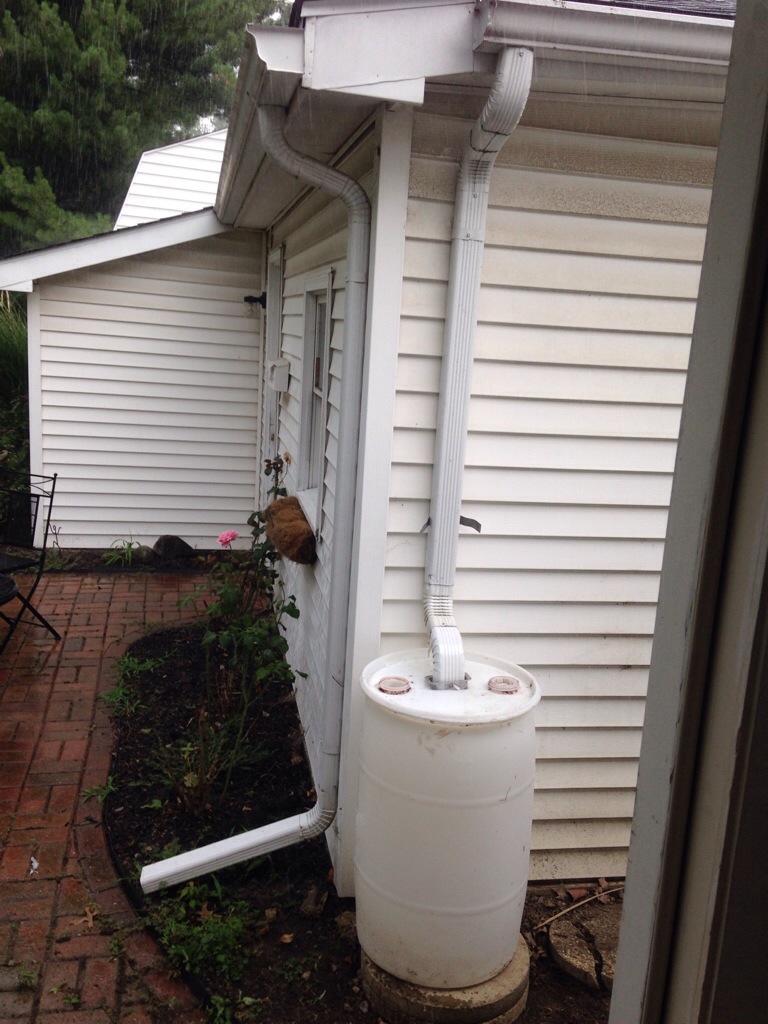

I’m amazed by how much water we could keep on site. I finally installed a 55 gal surplus food drum. One 1/2 hr thunderstorm filled it up!
Vacation was an awesome chance to shoot with a hero 3+black. 1080p @ 24fps.
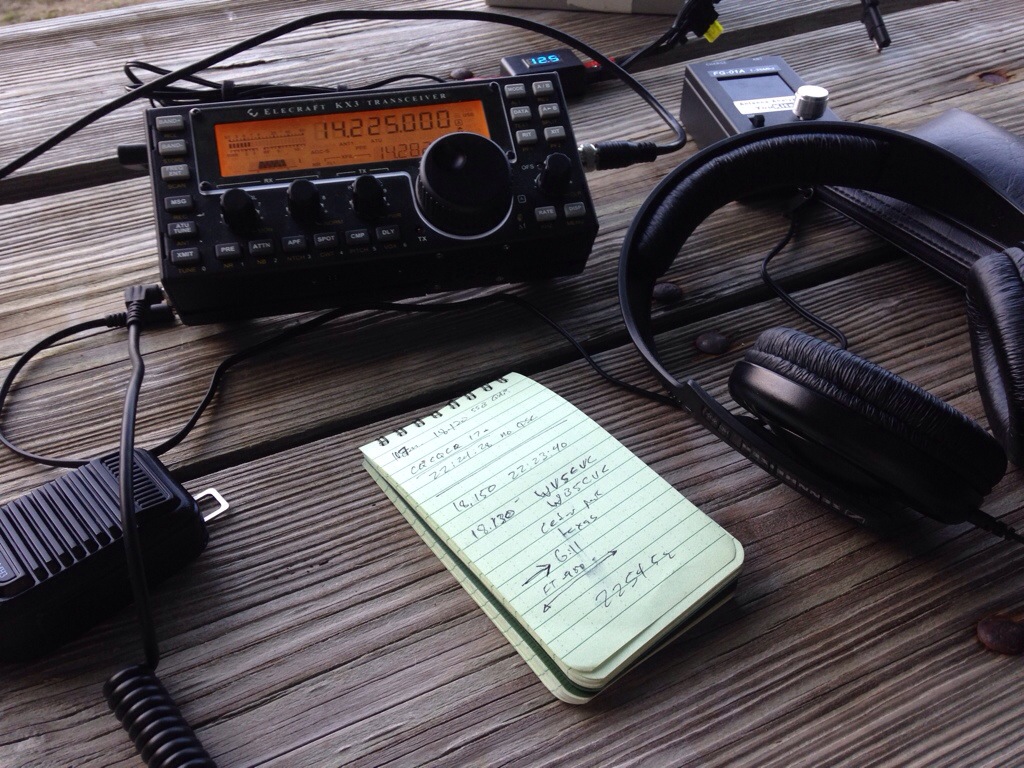
WSPR is amazing! A tiny and inexpensive transmitter sends low speed morse code that can be heard around the world.
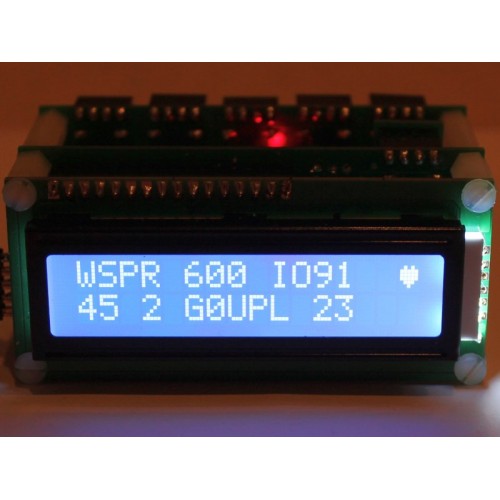
$29 WSPR transmitter kit from http://www.qrp-labs.com/

What is WSPR?
WSPR stands for Weak Signal Propagation Reporter, but it’s pronounced “Whisper” – quite an appropriate name as it is all about sending and receiving signals that are barely audible.
WSPR is a software application written by Joe Taylor, K1JT, a Nobel Prize-winning Princeton physicist. It was first released in April 2008. It uses a transmission mode called MEPT-JT. The “JT” stands for Joe Taylor, while MEPT stands for Manned Experimental Propagation Transmitter.
MEPT is not something specific to WSPR. MEPTs are very often simple home-built QRP transmitters that send beacon messages using very low-speed Morse (QRSS). Their very weak signals are copied visually using software called a “grabber” – a horizontal waterfall display capable of detecting and highlighting signals well below the noise threshold. The content of a transmission is determined – as with many other weak-signal QRSS modes such as EME (moonbounce) – by literally reading the dots and dashes as they are displayed on the waterfall.
The “manned” aspect of MEPT simply relates to the operator’s license conditions. It is not necessary to obtain a special dispensation to operate a MEPT station because you are present while it is in use, just as you would be when using CW, SSB or another data mode. In fact, some MEPT enthusiasts discourage the use of the term “beacon” because beacon operation without a special permit is prohibited by some licensing authorities.
http://www.g4ilo.com/wspr.html
Pi and Ham – Yes you can!
https://github.com/threeme3/WsprryPi

Here’s some self assigned summer homework with the gopro. I was able to shoot a few time lapse sequences. Each shot was 15 minutes of continuous video (1080p @24 fps) and the speed was increased 2300% in post. The rotation of the camera was achieved by mounting the camera on top of a $10 ikea egg timer. With clouds its an awesome effect. I’m currently working on a dolly rig with a hobby motor controlled by arduino.
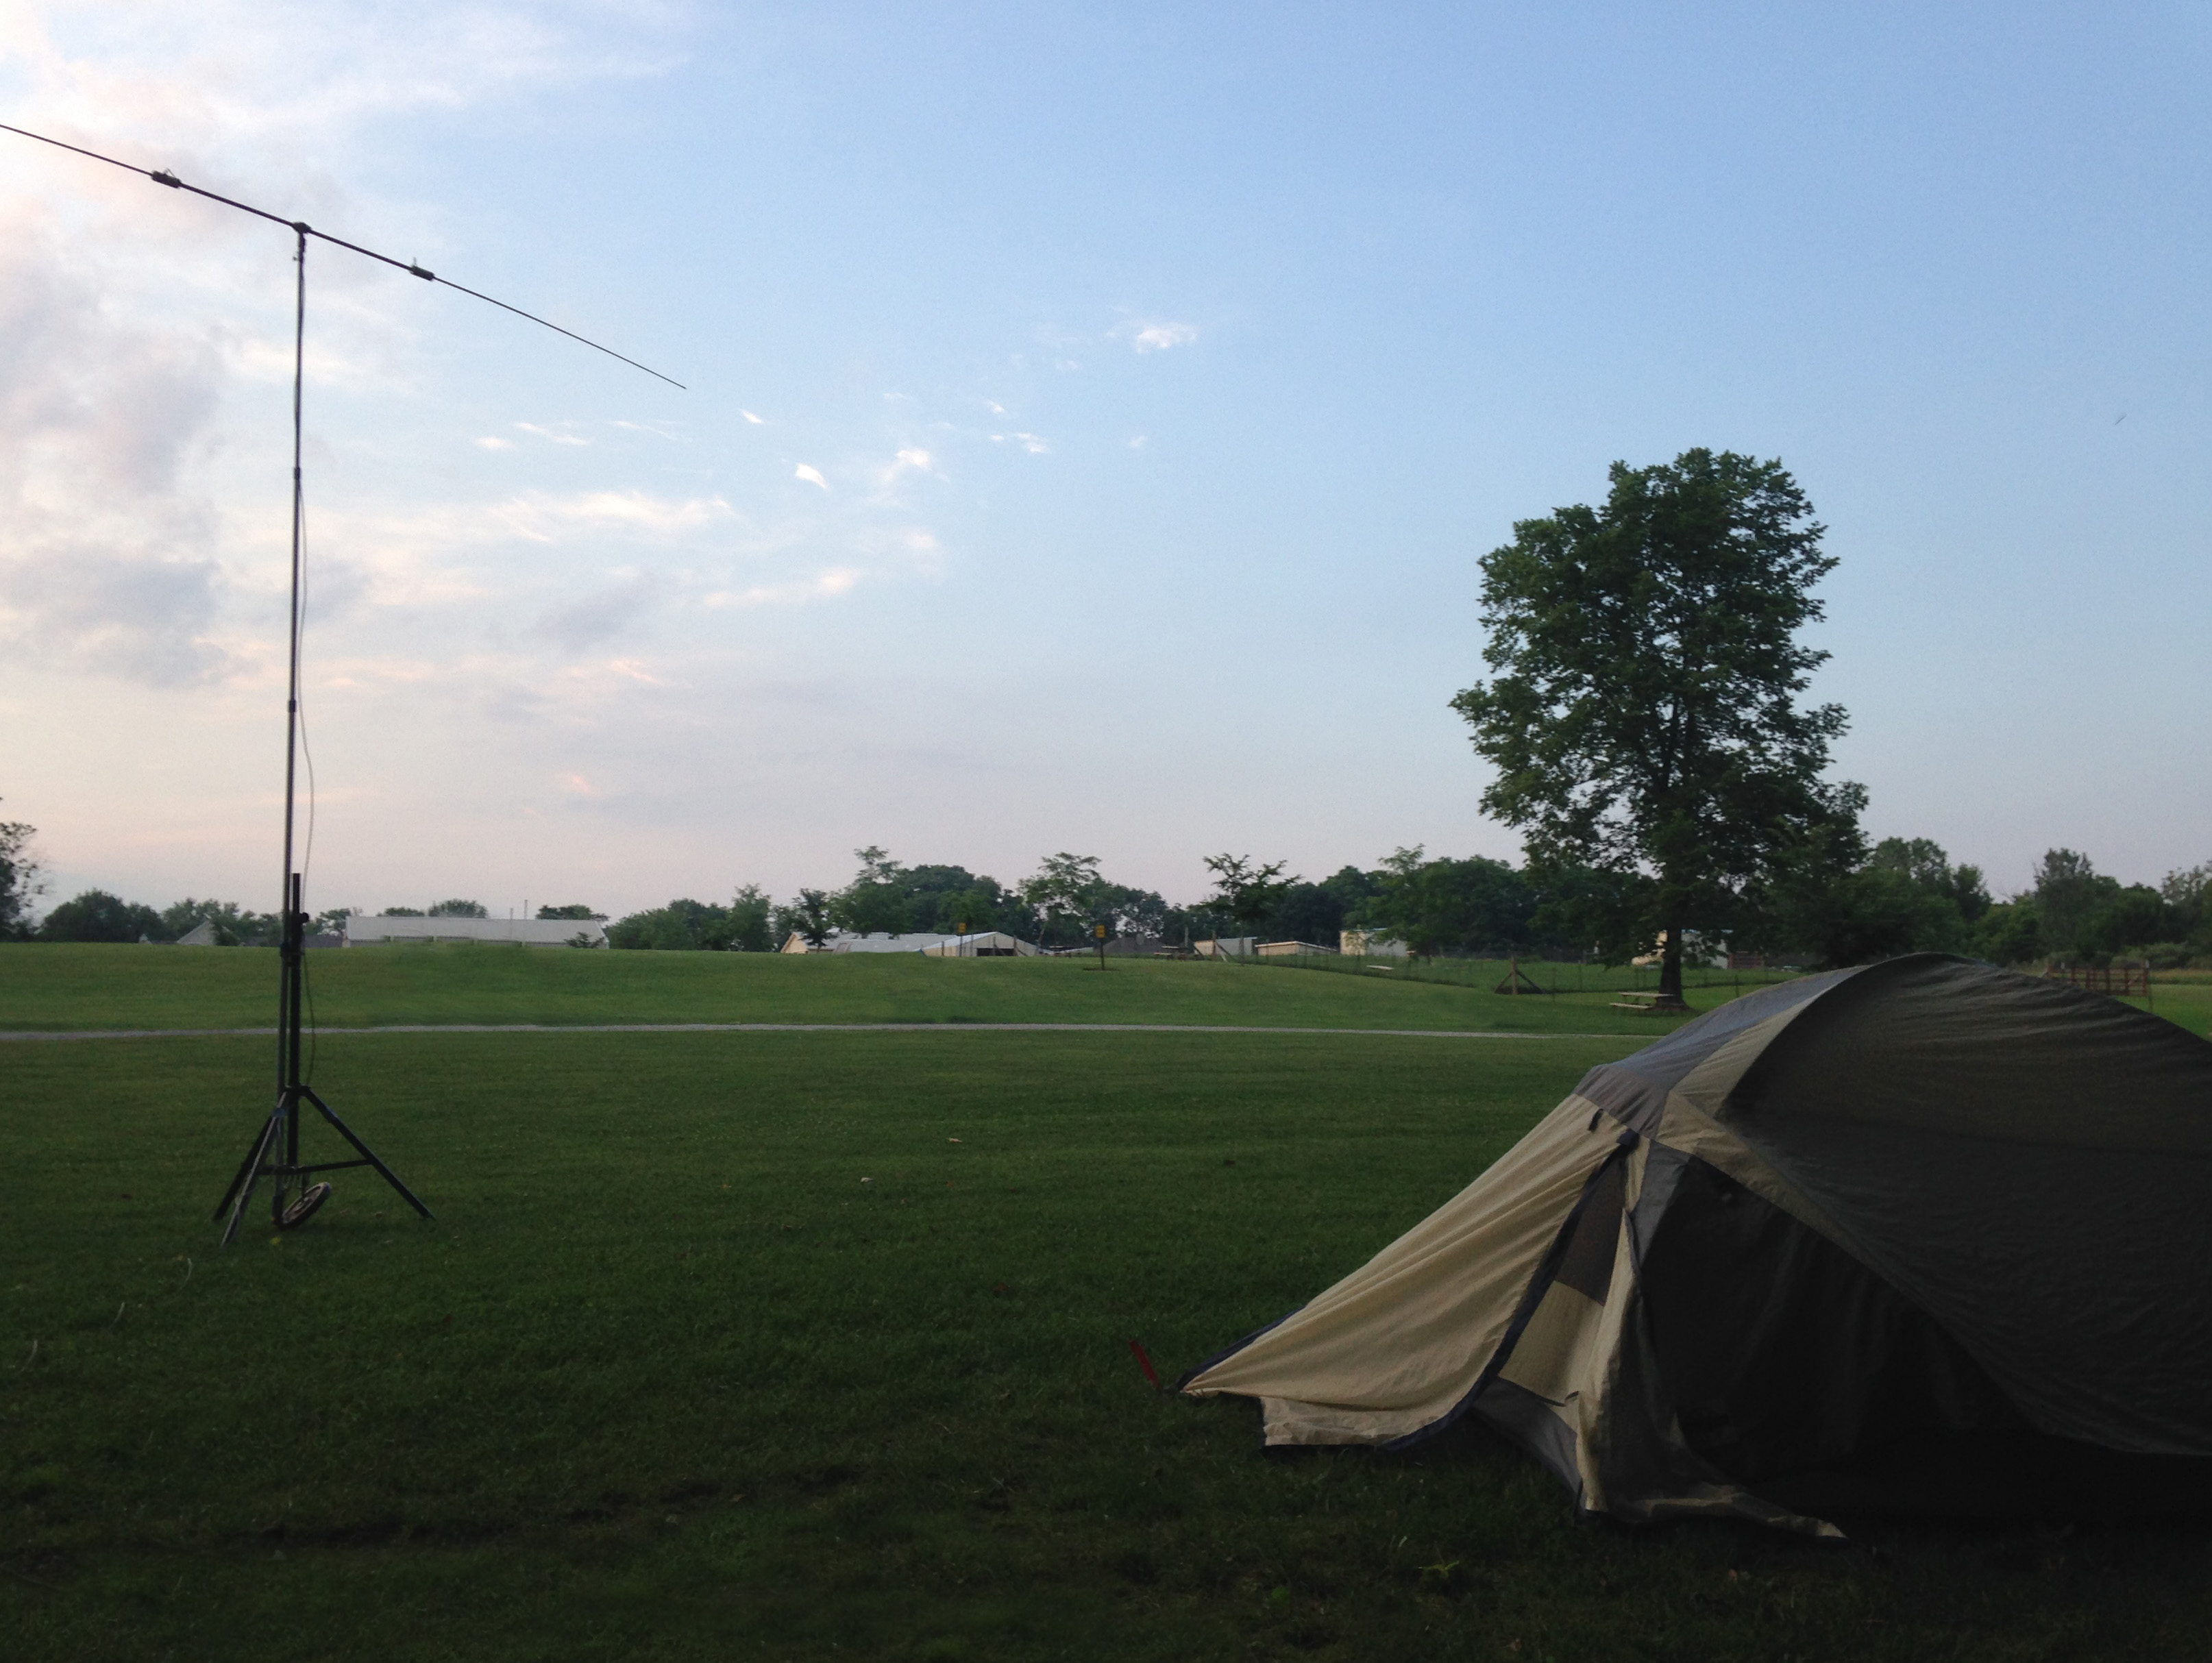
Took a couple days to drive to Dayton and visit the National Air Force Museum. I worked on my bike mobile rig with an evening of camping at the Dayton KOA. I had my first QRP QSO with Gill WB5CVC in Cedar Park Texas on 17 meters (10 watts with my kx3 and a buddipole)
I was working in the basement when I heard the water meter start running full tilt. I was the only one home. From the back porch I saw a big pool of water coming from my garden hose. I caught it all on camera…..
Check out this awesome student project:
The Radio Amateur is: |
|
| CONSIDERATE | never knowingly operating in such a way as to lessen the pleasure of others. |
| LOYAL | offering loyalty, encouragement and support to other amateurs, local clubs and the American Radio Relay League, through which Amateur Radio in the United States is represented nationally and internationally. |
| PROGRESSIVE | with knowledge abreast of science, a well built and efficient station, and operation beyond reproach. |
| FRIENDLY | with slow and patient operation when requested, friendly advice and counsel to the beginner, kindly assistance, co-operation and consideration for the interests of others. These are the hallmarks of the amateur spirit. |
| BALANCED | Radio is an avocation, never interfering with duties owed to family, job, school or community. |
| PATRIOTIC | with station and skill always ready for service to country and community |
Since I got my hands on the HERO3 Black Edition, I’ve been doing significantly more time-lapse. This is not because the stills are so much better than HERO2, and they are, it is due to the new video modes at 2.7K and 4K, combined with Protune. There is no need to time-lapse with JPEG sequences with this camera, unless you know you need a very long interval. Most time-lapse shoots that document human experiences, are better with shorter intervals between 0.5 and 10 seconds. Knowing what interval is best takes practice, but forget that! With the new camera shooting 4K at 12 or 15fps, basically a continuous 9MPixel motor drive sequence (stored in an MP), time-lapse guess work can be left to post. Resampling 4K video to your needed interval is a straightforward process in most video tools, and a standard feature in the free GoPro CineForm Studio software.
At 4K you get most of the spatial resolution of the still mode, at 6+ times the temporal resolution (12/15fps vs a maximum of 2fps for JPEG) at approximately half the data rate. So there is a data rate saving using the video modes for simulating the shorter intervals, but for long intervals there are still reasons to shoot ultra-HD video over stills — simulated longer shutter intervals. The HERO cameras mainly use the shutter speed to control exposure, which is fine for high action moments, but for scenes best for time-lapse a fast shutter may not be desirable. With a DSLR, you can stop down the camera’s aperture, but that only gets you so far. For time-lapse exposures of 5 seconds of more, that would require a lot of neutral density filters for daylight shooting. For a HERO camera, aperture control is not available, and adding neutral density is highly impractical, so we need do the camera operation in post.
So let’s say you want to simulate a 5 second exposure with a 10 second interval in full daylight (simulating a 180 degree shutter at play speed.) HERO’s default exposure might be around 1/1000th of a second in strong daylight, nowhere near the 5 second exposure target. Yet the camera could be recording 4K at 12fps over those 5 seconds, collecting 60 individual frames. If you average those 60 frames, you get very close to the look of a single long exposure from a DSLR with a hell of a lot of ND filtration, without the setup headache. Typically blending over 30 frames for daylight simulates the motion blur of a single exposure. With darker shots that might have the camera’s shutter exposure near 360 degrees (1/30th for 30 fps video), far fewer frames can be blended for a natural look. Of course, the more frames used in averaging, the smoother the results. I have been asked how a GoPro achieved this high action shot with so much motion blur:
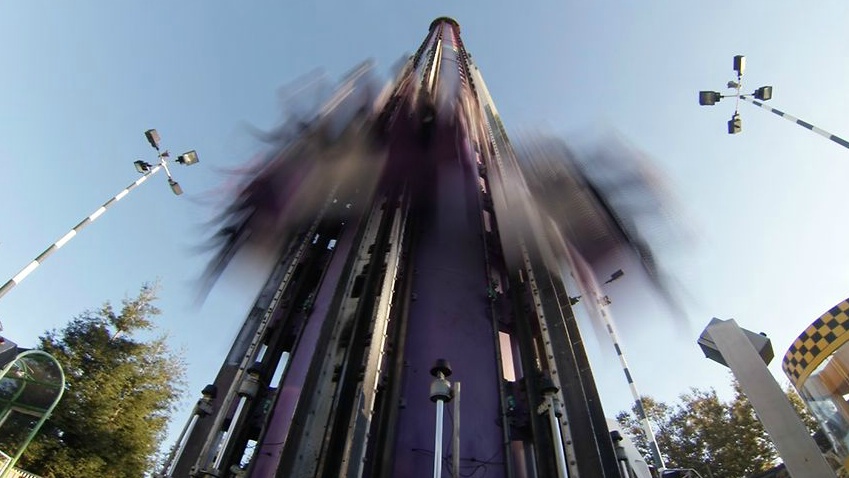
Now you know. This was shot 1920×1440 at 24p, with 30 frames averaged for each single frame in the time-lapse output.
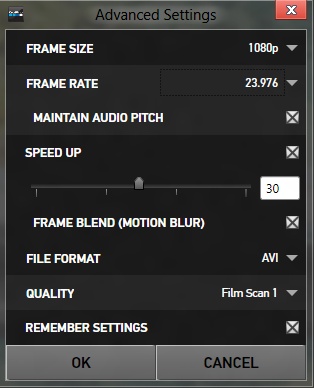
Continuing with the target of 5 second exposure and with 10 second interval, I was intending to model 180 degree shutter, however the CineForm Studio software with the Motion Blur enabled will simulate 360 degree (this was by design.) So setting “SPEED UP” to 60, “FRAME BLEND (MOTION BLUR)” on and the output frame rate to 23.976p, the result will be a clip with 5 second exposure and a 5 second interval.
To get this to simulate a 10 second interval simply place it in your editing tool’s timeline and double the playback speed (with frame blending off.) Now every other 5 second exposure will be displayed for 180 degree shutter emulation.
Protune helps greatly, particularly in low light. Now that we are averaging frames together, we get an excellent side effect: a large reduction in noise. Each doubling of the number of frames averaged will half the noise in the image. Combined with Protune, which preserves much more shadow detail, you can basically see new details that would normally be lost to noise with regular video or stills time-lapse. Protune lifts the shadow detail so that it is no longer crushed to black. In standard mode, averaging crushed black only results in more crush black, yet in Protune averaging a noisy shadow detail results in more shadow detail.
I’ve used this technique in most of my recent videos, such as this one (the night time-lapses are very clean, because of HERO3 Black and this averaging technique using CineForm Studio):
24 Hours of Lemons at Chuckwalla Dec 2012. from David Newman on Vimeo.
Update Jan 5/2013: Example comparing classic and video blended time-lapse
P.S. For those who have been following my Instagram feed (http://instagram.com/0dan0) or via Twitter (@David_Newman), you are likely aware that I’ve been combining the above time-lapse technique with a motion controller I have been experimenting with. This combined a GoPro with a 3D printed motion controller that runs on toy G-scale train track. I’ve just posted its design on thingiverse.com, for this project. Let me know if you successfully build one, and link me to your videos.
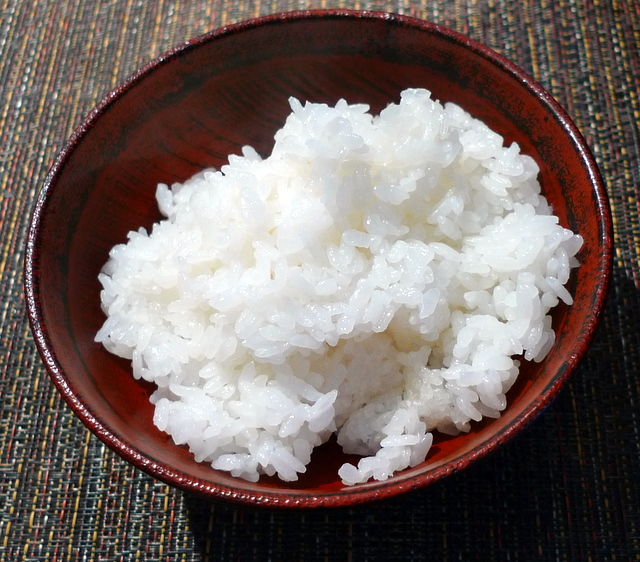
Look out that beautiful rice in the photo above. Every grain is glistening, polished, plump perfection. Nobuko-san cooked it in a regular rice cooker — my rice cooker. But my rice never comes out this amazing. So what’s Nobuko’s secret? It’s how you ready the rice, she told me. We say “washing rice” but what you’re doing is (a) rinsing off surface starch, (b) polishing the grains by rubbing against each other, and (c) hydrating the grains. In Japanese there are two words for rice, kome, for the grain, and gohan, for the food. When you cook rice, you’re transforming it fromkome to gohan. (There’s also a word for the instant this metamorphosis occurs, but I can’t remember it!) But how? When washing rice, you’re in a sense germinating the dormant seed: Moisture is what brings it back to life. And moisture is the medium through which heat travels; each grain has to be perfectly hydrated to cook perfectly. So how do you do that?
Check out the video below. First Nobuko quickly rinses the rise, sloshing the liquid around and pouring off the milky water quickly — you don’t want rice to sit in that water too long or it will cloud flavor. Second, she polishes the rice by a hand movement we’ll call “punch, punch, turn, turn.” Notice she does this quickly and GENTLY; you don’t want to break the grains. Third, she rinses off milky liquid again, two times. Fourth, she repeats the punch-turn routine again. Notice when she turns, she’s moving the grains to the center of the mixing bowl. Notice, too, she doesn’t waste nary a grain. Fifth, she rinses the rice three or four times until the water runs clear. Three minutes and she’s done with the whole process. Finally, Nobuko transfers the rice to a colander, covers it, and lets it rest for 30 minutes before cooking, so the grains have enough time to miraculously absorb just as much moisture as they need to steam perfectly. Nobuko’s been cooking rice for, oh, sixty years or so. But with a little practice, you (and I) can improve our rice-washing skills! Here’s the video: