Improvised Paint Booth

I was having a hard time finding an appropriate place to spray the body and neck. I ended up lining part of the crawl space about my studio with visquene and stapling a furnace air filter over a vent, not sure if that will do anything but it seemed like a good idea. I emptied a can of old clear coat on the surrounding surfaces thinking that the aerosol will hold down dust particles in the space. With a large fan running in the room below I’m getting decent ventilation without kicking up much particulate matter. I’ll see how good this is when I start with color.

Thinking safety I invested in a good quality respirator and I always wear eye protection. I shot 3 thin coats of valspar primer (over 8 hours) on the body with good results. I then masked the neck and shot two coast of sanding sealer on the headstock, the results blended nicely with the existing finish on the neck.

Here’s the primed body

Here’s a shot of the newly sealed headstock. I had a hard time getting the contour on the back of the headstock where I wanted it.

Stage Makeup

Here are photos of the completed hardware, other that cutting down the screws that adjust intonation. I’m very happy with results. The level of crime and corruption is well beyond most of the vintage instruments I’ve seen. After I had completed my first round of etching and rusting I think I did a pretty good job of creating an accurate amount of deterioration, given the type of chrome on the saga (reference the photo on my 4.3 post).

I showed the results to my wife and she couldn’t tell I’d done anything at all. Granted shes not technical and cant tell the difference between a Les Paul from a Strat, but it made me rethink the effect I was going for. Ultimately I want “stage makeup” not tiny the nuances that only a vintage buff will really understand, I’ll save that effect for another guitar. So it was back to the etching bath for another round. I ended up with the “wrapped in an army blanket and left in the corner of the garage behind old wooden shutters and forgotten for 50 years” look.

A few note on process: After re-etching I did a short rust bath (about 2 hrs) I ended buffing most of that effect off with the exception of the tuner covers, I liked the green cast they picked up. I rubbed black shoe polish into the chrome, it caught in the corners and pitted areas and added a slight layer of grime. Before I reassembly I hit the parts with a layer of clear coat.

For the pickup a used an exacto and carefully scuffed the edges and took a few small bites out the edges with end cutters and then back to the exacto to soften the cut edges. I also used a little brown oil pastel near the magnets to simulate rust.

A Quick Cut


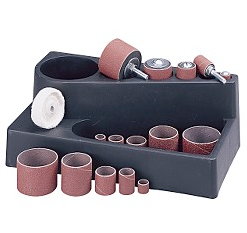
We had a wonderfully warm day so I ventured out to my shop and cut the headstock down to shape. I smoothed the profile with the new drum sander kit attached to my drill press. It worked nicely.

I shaped the headstock from a telecaster CAD drawing, the position of the tuners is a little off releative to a real tele but I think it will work fine on the Saga. I’ll post the file if anyone is interested.

Etching Day

I decided to start with the larger pieces to establish the amount of material. I wanted to chew through. I used a solution of 50% water and 50% etchant and submerged the bridge and control plate for three minute intervals. Between each dip I rinsed in water and used a paper towel to rub away the corroded remnants on the surface of the metal. I ended up etching for around 20 minutes. The result was slightly pitted with a nice dull reddish brown tone.

After drying the parts I applied the rusting liquid and let it sit for about an hour. The result left a very green surface on the metal but when this was buffed away it darkened the the finish slightly and slightly broke down lines of scratches in the metal.

I repeated the process with the smaller hardware. My biggest concern were the small threads on the bridge so I held back the small stuff and I put a bead of hot melt glue through the threaded parts of the bridge saddles. I’ll boil the glue out after etching.

I separated the hardware into surface area similar batches and used a couple of glass jars and etched the parts in bulk. After the water wash I dried the parts and gave them a shot of wd-40. I may “rust” a few more of these before assembling later.

The last step of the day was to apply black shoe polish on the big parts to decrease the contrast in the finish a bit.

Heres a pic mid rust, I’ll post photos of the completed hardware once I have the bridge and control plate back together.

Round and Round

I made a sketch of the tuners and then broke them down so I could start the hardware relic process. I placed all of the small hardware into a small rock tumbler with a handful of stones and let it bounce around for about two hours. Unfortunately the control plate wouldn’t fit so it looks like I’ll be doing that one manually with a coffee can.

I did a test on the body of the shown tuner with etchant and it knocked the shine off rather well, compare it to the shiny but scuffed appearance on the top of the peg. The green cast on the bridge and the side of the tuner is from a computer monitor. Click on the image above for a BIG view.

As my research has continued I found a wonderful site relicdeluxe.com This site is indispensable for creating a relic instrument.

Teardown

After everything was together and working correctly I started the process of tearing it back apart. I re tasked a flip top plastic organizer to keep all of the hardware organized and dissembled to individual components.

Thinking ahead to reshaping the headstock, I picked up a 21pc drum sanding kit at sears hardware for 15.99.


T
he next step will be to start adding about 50 years of wear to the metal hardware.

The Saga Begins

The kit arrived well packaged with parts in divided bags. I was mocked by several coworkers who had seen the package in the office and popped into my lab and made bad air guitar moves telling me it was a long way to the top if I want to rock and roll (I was mildly impressed with the AC/DC reference)

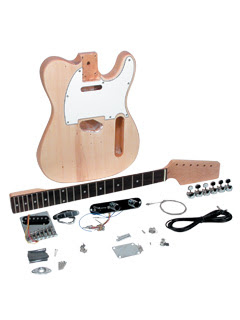
With the kit safely home I unpacked the kit using a plastic parts tray to sort the hardware. Following the advise of most Saga builders I decided to assemble the kit before starting the
finishing process. This took the better part of three hours. The guitar went together quickly. The neck fit the pocket in the body beautify. The pick guard is out of alignment by a few millimeters but this is being replaced anyways. I ran into trouble when I tool a closer look at the electronics on the control plate.

I think it was someones first day at the saga factory:

A redundant ground wire was running from the from the volume pot to the tone pot that popped off with the first touch. Snip

A black mystery connector (another ground) had no corresponding wire from the pickup cavity. I thought this was a ground for the bridge but there was another one correctly labeled. Snip

Connections have a bullet style connector and a section of heat shrink tubing, but the ground from the pickups would have required an adapter to accept two bullet connectors. Snip

The last straw was the three way switch that was wired incorrectly the joints looked cold (dull and pitted as did all of the connections for that matter) and the leads from the pickups didn’t bridge the two terminals on each side of the switch. At this point I decided to get out my soldapult and tear all of the connections down and start over. This added about an hour but the guitar sounded 10 times better after I was done.

Don’t get me wrong I’m not complaining at all! I have no idea how this kit can be sold this inexpensively. I was expecting two pots, a cap, switch, jack and a coil of wire in the nicely divided bags containing the other parts. I’m sure saga would have also included a small coil of solder.

I strung the guitar up with the included strings and started the setup process. I dropped the saddle height to get things in the right ballpark, the neck looks great right out of the box. I made quick work of the setup with the exception of the a small problem with the E and A saddle. Intonation on the E and A strings are still a little sharp and I’ll have to cut the tension spring down a bit so I’ll have the clearance to pull the saddle back a few millimeters.

I spent a few minutes adjusting pickup height, and got a decent balance between the bridge and neck output level. Clearance on the neck pickup might be a problem if you really layed into the guitar but I’m usually not a heavy handed player.