Category Archives: tc-10
Note To Self
As the guitar part of this project is wrapping up, I wanted to reflect on a few things I’ve learned through the process.
1. Test on scrap. And have scrap to test ON! I should have started a couple of sanded and sealed boards to test finishes and relic techniques before I worked on the body itself.
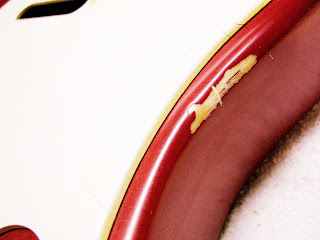
2. My biggest mistake of the project was allowing water to seep into the edge of the control cavity route and screw holes during my first round of wet sanding. The wood swelled and created a flat spot in the finish. Way too much water, and I let it sit around the edges. I need to make sure I really hit the routes with primer early on. I also learned to re-wet constantly to keep the sandpaper from clogging. I also saw a guy using a 2 litre bottle cap as a sanding block and this worked very well for the edges
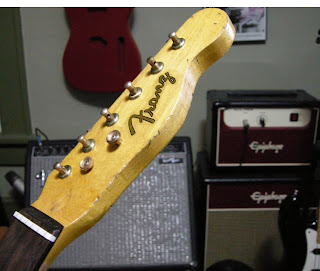
3. With the decal process I used too much gold gel ink and mod podge, this added material made it dificult to get a firm flat seal on the headstock. Thin is the way to go.
4. Spray thin coats, Color was fairly forgiving, but the tinted laquer would show even the tiniest overlap or run.
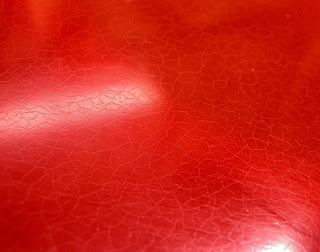
5. I’ve been looking at alot of old guitars and the stereotypical relic guitar wear isn’t that consistant with alot of the old gear I’ve seen. Very few of the late 50s and 60s strats seem to have extensive forearm wear. Alot of edges wear but this seems to be due to a buildup of dents and dings on the rounded edges that allow larger sections to break away.
6. The direct acid etch process on hardware is way too heavy for a “real” relic look. I like the effect, but it’s not really an authentic effect. An indirect method using muratic acid in a closed container looks 100 times better than the results I achived. Took at http://www.relicdeluxe.com/ for some great relic techniques.
7. The more visulazation and planning I do before I start, the fewer mistakes I make.
Almost Done
Thinking Setup
I’m waiting for the finish to settle a bit before wet sanding. I’ve spent some time reading up on final setup.
I was surfing telecaster.com today and found a great thread that mentioned guitar setup and the below method for creating a solid connection between the neck and body. I’m going to give a try when my tele is done.
“Another thing I do is to loosen the neck screws about a 1/4 turn when the guitar is in tune (there should be a cracking sound – it’s OK) and tighten them back. The guitar will drop in tune and will need to be re tuned but…. what a difference…. It forces the neck for a much tighter contact with the body (heel against pocket wall). Adding those two things to any build (or existing guitar/bass) will make a noticeable contribution to tone and sustain.”
Almost Done
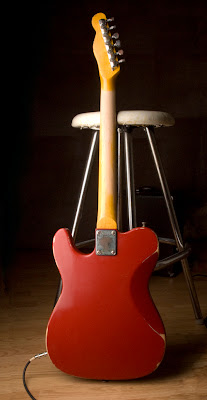
I’m in the home stretch. I’ve added some more detail to the headstock and neck, A little walnut stain really punched out some of the scratches. At this point the neck is done, I’m in the process of clear coating the body. I should be done within a week.
I cut the grill and counter sunk screws so it can be attached to the case. I also sprayed it with primer on the front face. It’s transparent behind the grill cloth.
Next week I’ll etch the control panel. Stay Tuned!
Slow Going
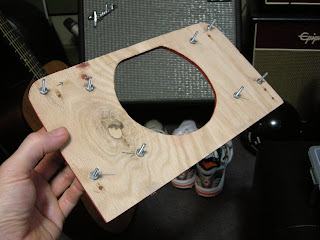
I haven’t had much time to work on the projct over the past few days. I did spend some time working through how I was going to attach the grill and speaker mount to the radio case. I ended up counter-sinking screws in the 1/4inch oak grill and these will sandwitch through the radio case and the speaker mount. I used a retaining nut behind the grill so I can glue the grill cloth to the front and keep everything in place. I also used a brown primer on the oak in case it shows through the grill. Photo to follow.
Deep Breath, Bang
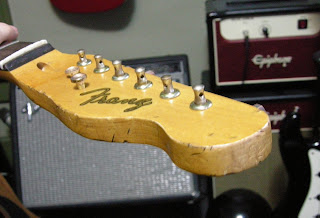
I have two legitimate “old” guitars, a 70s tele custom and a 60s hagstrom II. I’ve spent allot of time with both and I’ve studied the wear patterns and how the scars have been naturally buffed over time.
I’ve built a color that I like, now I need to work on the texture. On my real tele there’s allot of wear on the top of the headstock where its been bumped countless times. The finish has a slightly milky appearance where the abrasions have occurred. No big gouges, but allot of small dents and bumps that add up.
Now, to start on my guitar, this was a little harder than I thought it would be. The hardware was no problem, into the hydrochloric acid you go. It’s tough putting a ding into a finish you just completed. I chose a pair of end cutters for the first blow. Deep breath, tap, inspect, slight dent, good. change tool, framing square, tap, inspect, tiny gouge, good. Rinse and repeat. My favorite tool was a heavy plastic screwdriver handle, it made nice subtle dents. I liked the slight dents in the finish where the nitro didn’t show any signs of cracking but you could see the mark when you would turn the neck and inspect it. I created a ratio of about 10 dents to 1 nick. No gouges yet.
The next step will be to add a super thin wash of color to the damaged edges to simulate the grime that will accumulate in the wounds. At that point I’ll evaluate and repeat the process, dents and nicks and wash, making the effects more subtle with each pass. Hopefully this will start to simulate the depth you see in old guitar finishes.
Here’s the first round of dents and dings, no wash yet. I’ve created about 90% of the look I’m going for. The next rounds will be very subtle in comparison.
Vintage Color
I’m really happy with the color of the vintage amber tint and the appearance of the logo underneath. I still need to build up some clearcoat to hide the edge a little more.
I realized that shooting something translucent in allot more difficult than an opaque color. There are a couple of spots where the color built up a little too much. I wet sanded the body with 600 grip paper. I applied too much water to the surface and the paint is swelling along the grain of one of the screw holes. I’m a little frustrated by this, but on a relic guitar isn’t that called “character”?
I stopped sanding for the day after consulting Google and finding that when this type of swelling occurs it’s easy to sand through the finish. I’m curious to see how this effects the finish in that area at the moisture dissipates, if it dissipates.
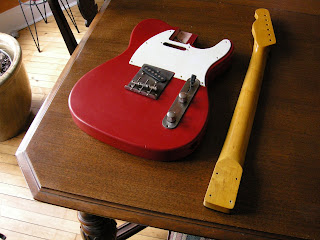
Here are some photos from the progress. I’m getting eager to see the guitar together so I placed the pick gaurd and hardware on top of the body.
Leap of Faith
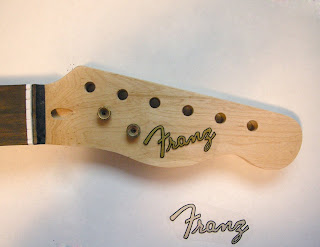
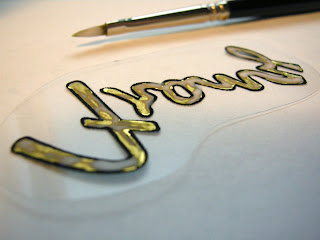
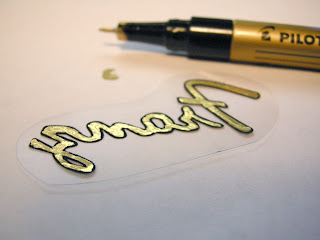
I created my decal for the neck using an awesome technique from Bill Jehle at projectguitar.com creation and application went well. Here’s a quick recap and photos:
An inverse logo outline was laser printed on transparency film. I used a pilot gold gel pen to color in the logo. I then applies mod podge (matte) to protect the gel paint from the adhesive spray. I masked the headstock and shot spray adhesive to the headstock and logo. On my test logo the spray can propellant pushed the logo about a 1/2 inch an left a little residue on the top of the logo. I used the tip of tweezers to hold the logo down when I sprayed the second one. After waiting the recommended minute i used tweezers and placed the logo on the headstock. I rolled my finger across the surface to get rid of a few tiny air pockets. Most of the overspray on the headstock balled up and rubbed away as I rubber out the air pockets. After 5 minutes I used a drop of naptha on a paper towel to clean up the rest of the adhesive residue.
After an hour a shot my first coat of nitro (stew mac vintage amber) on the headstock and neck. I’m a little worried about a reaction with the sanding sealer, but following the advise of a fellow builder on guitar attack I tested on scrap and it worked fine.
I decided to post on the blog to kill time before my next coat of nitro.
Here are photos from the process:
Finished logo before the adhesive process
Layer of Mod Podge starting to dry
Trying to stay between the lines with the gold gel pen
OK a half hour is up, I got go check the finish and shoot another coat!
Relic is My Favorite Color
I know a lot of the folks disagree with the idea of a relic instrument. The battle scars should be earned and not applied with a razor blade. I collect antiques, I live in a house built in 1920. I love the patina of old stuff. New stuff makes me nervous. When I was 21 I spent my “life savings” to buy a 335 custom shop. It was a tobacco sunburst, and it was amazing, a flawless instrument. Every time I picked it up I was afraid I was going to scratch it. I felt relieved when I sold it a couple of years later. In comparison my favorite guitar is a 70s tele custom that’s was a disaster when I bought it. I never thought twice about laying into it and a scratch only adds character. Old stuff rocks.

