Category Archives: project

3rd Can of Krylon

I got my third can of krylon on the body and I’m going to let it sit for a week or so before I wet sand.

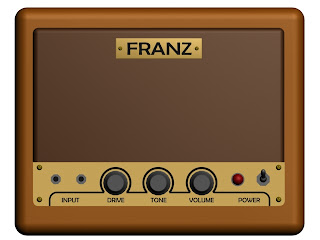
In the interim I have the amp to work on. I got my brass stock in the mail today – gotta love amazon prime. Pics below show the progress I’ve made. I’ve shaped the oak plywood for the grill and cut the speaker mount to fit the philco radio case.

Brass Tarnishing Techniques

Scraps from the web on tarnishing brass, this is what I found with a quick search. Nothing here has been tested.

1. Choose a glass container with lid of sufficient size to contain the item requiring aging. Find some cotton wool and soak in ammonia and place in bottom of jar. Suspend brass item in jar and attach top. Brass item will tarnish fairly rapidly say 20 minutes depending on room temperature. Remove from time to time to check amount of aging required, then remove and neutralize ammonia with clean water.

2. You will think i am a freak for this, but bury it in the kitty litter box for a couple of days. Then wash well.(!) It will give a really interesting oxidized effect. (obviously i have way too much time on my hands)

3. You can repatina brass and bronze depending on the look you are after, simply, and at little expense. I use a closed container, bucket & lid, or whatever comes closest to fitting around the brass item. Polish and clean off any hand prints with paint thinner, wear gloves at this point. Locate a small jar and lid, place in this 1/8 cup of ammonia. Do this out doors with a breeze at your back. Masks and gogles are a bennefit with ammonia, but no mask will seperate amonia from the air you are breathing, so be warned. Next put the brass item in the container, put the small jar inside, remove the lid from the jar and cover the bucket. A clear container works well here, or else look inside from time to time to see how things are doing. Goggles help the peeking. Keep track of the time if you wish to repeat, and replace the ammonia with the same amount of fresh ammonia each batch. Next I take a polishing cloth, clean and very soft, buff the edges for highlights, spray with brass lacquer, or spray shellac. Some hobby shops are selling metal ageing chemicels that can give assorted colors, so if the ammonia isn’t the darkening you want, try them too.

4. Salt and Vinegar

Wear Your Respirator

My wife noticed a rash on my face at the edges of my goatee this morning. It was very red but I didn’t feel any irritation. On closer inspection the color is berry red, krylon berry red to exact. My respirator isn’t sealing very well, I have to snug up the straps.

Hmmm… I wonder what my lungs look like.

I think I’ll paint my next guitar a nice youthful brown to get rid of the grey in my beard. Anyone have any guitar finishing techniquest that will help with a bald spot?

Another Trip to the Hardware Store

I purchased a sheet of ¼ oak plywood, a pack of blades for my scroll saw, and some brass hardware for the amp build. I liberated some brown grill cloth from a pair of speakers sitting in the basement. I’ve started the layout to reinforce the radio case and mount the speaker. I also ebayed a set of jewel lamps, unfortunately I couldn’t find the vintage purple pilot light I had in the archives. I’m sure it will turn up as soon as the new ones arrive.

I’m very excited about creating the control plate for the amp. I posted on the telecaster.com forums and shared a site showing how to etch brass. I think a tarnished brass control plate will a custom etched graphic will be a perfect fit for the amp! Links here and here

I’m on my second can of krylon on the tele body and I’m getting ready to apply the headstock decal and start shooting clear coat on the neck.

Here’s a 10 minute 3D model of the amp mod:

Paydirt at Hamfest

I’m finding that the finishing work on the guitar requires allot of patience and I need another project to keep me busy so I don’t rush through the work and get sloppy.

I spent part of the weekend taking my grandfather-in-law to the Toledo Hamfest (Home and Mobile Radio, not honey baked) I’m not a ham, but I appreciate a good electronics themed flea market as much as the next guy. My mission was to find some hardware and a case to build a small amp to accompany the TC-10.

I got lucky and I found about everything I need to build a cool “vintage” looking amp – for $20!!!!

Here’s what I found:

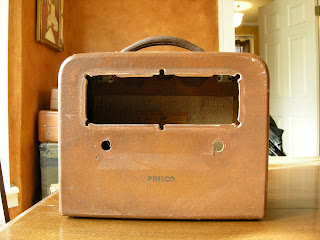
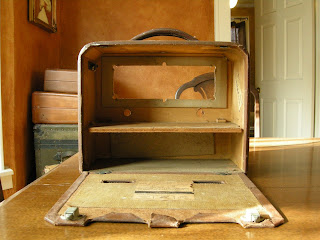
philco radio with a great case $5.00 (haggled down from $10)

pignose hog 20 practice amp (not working until I replaced the fuse!) $10.00

3 bakelite knobs, vintage power switch and fuse holder $5.00

I cracked open the pignose, solved the fuse issue and found a suitable power supply. It came with a mismatched 15v laptop power brick. It sounds great for a ten dollar investment. I broke down the amp so it can be mounted in its new home. The hog 20 has the option of battery power and also has two 6v sealed lead acid batteries, I’m wondering if I can save weight and cost by using a NIMEM cells? A little research is in order.

Here are photos of the booty in all it’s vintage splendor:

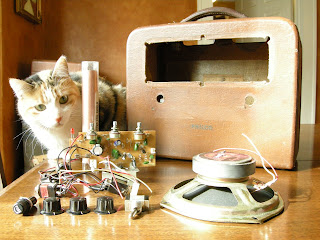
Philco case, pignose speaker and guts, knobs, switch, fuse holder, and pixel the cat.
Philco detail front

Philco detail back, the case has an awesome hinge and latch system.
hardware detail (click the image to view LARGE, the detail is great)


In addition to the amp stuff, I found a huge roll of copper foil $3, a shopping list of electronic components for other projects $40?, a trashed Victrola $10, a couple of cool vintage radios $20(decoration) and tron on laser disk $2(I’m a geek, I collect tron memorabilia)

I have a cool purple jewel lamp holder that I pulled from something a while ago that will look great on this project. I’ll have to find a suitable grill cloth and make a bezel of some sort, I think It will be a cool little amp when it’s finished.

Waiting for Paint to Dry

The color, valspar berry, is consistent across the body, the salmon appearance on top was caused by the light source.

I’m in the process of painting the body, I’m 5 coats in. I have one slight sag in the paint where I shot a little to long, but at the advise of Mr. Holley I’m going to wait to knock it down until I have a little more paint on the guitar. I’m waiting to wet sand until I have the clear coat on, again at the advise of Mr. H.

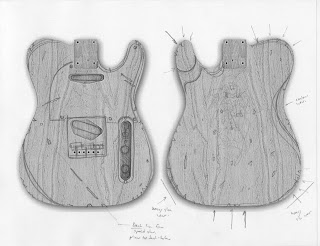
I spent a little time planning the relic pattern for the body, I’m going to buff between layers of gouging to create layers of wear. I’m also hoping I can create a checked finish. I’m trying to improvise a high UV light source to help cure and “age” the finish before attempting checking with heat gun and compressed air propelant.

Here’s a sketch of the planned carnage:

Case Candy

I gave a long lab assignment today that kept my students in the zone, I had time to research some old fender advertising from the 50s and 60s. It inspired me to create a registration card for my relic. It sparked an interesting discussion on the role of research in design with my students.

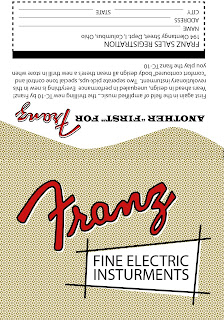
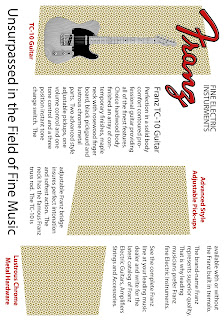
The card is designed to fold in the center, the first image is the exterior and the second is the interior. I used text from several cool old fender advertisements I found at relicdeluxe.com. Here’s what I came up with.

Exterior text:
Another “first” from Franz. First again in the field of amplified music… the thrilling new TC-10 by Franz! Years ahead in design, unequaled in performance. Everything is new in this revolutionary instrument. Two separate pick-ups, special tone control and “comfort contoured” body design all mean there’s a new thrill in store when you play the Franz TC-10.

Interior text:
Franz TC-10 Guitar Perfection in a solid body comfort contoured professional guitar providing all of the finest features. Choice hardwood body finished in an array of contemporary colors. Maple neck with rosewood finger board, black pick guard and lustrous chrome metal parts. Two advanced style adjustable pick-ups, one volume and one tone control and a three position instant tone change switch. The adjustable Franz bridge insures perfect intonation and the softest action. The neck has the famous Franz truss rod. The TC-10 is available with or without the Franz built in tremolo. The brand-name Franz represents superior quality. That is why leading musicians prefer Franz fine electric instruments. See the complete Franz line at your leading music dealer and write for the latest catalog of Franz Electric Guitars, Amplifiers, Strings, and Accessories.

Here’s what I developed, its a work in progress. I’m going to use the exterior halftone pattern on the interior gold panels, I’ll also add images of hardware in the panels.

Improvised Paint Booth

I was having a hard time finding an appropriate place to spray the body and neck. I ended up lining part of the crawl space about my studio with visquene and stapling a furnace air filter over a vent, not sure if that will do anything but it seemed like a good idea. I emptied a can of old clear coat on the surrounding surfaces thinking that the aerosol will hold down dust particles in the space. With a large fan running in the room below I’m getting decent ventilation without kicking up much particulate matter. I’ll see how good this is when I start with color.

Thinking safety I invested in a good quality respirator and I always wear eye protection. I shot 3 thin coats of valspar primer (over 8 hours) on the body with good results. I then masked the neck and shot two coast of sanding sealer on the headstock, the results blended nicely with the existing finish on the neck.

Here’s the primed body

Here’s a shot of the newly sealed headstock. I had a hard time getting the contour on the back of the headstock where I wanted it.

Stage Makeup

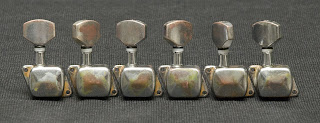
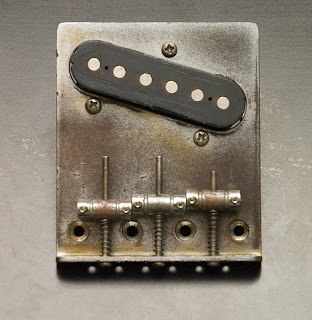
Here are photos of the completed hardware, other that cutting down the screws that adjust intonation. I’m very happy with results. The level of crime and corruption is well beyond most of the vintage instruments I’ve seen. After I had completed my first round of etching and rusting I think I did a pretty good job of creating an accurate amount of deterioration, given the type of chrome on the saga (reference the photo on my 4.3 post).

I showed the results to my wife and she couldn’t tell I’d done anything at all. Granted shes not technical and cant tell the difference between a Les Paul from a Strat, but it made me rethink the effect I was going for. Ultimately I want “stage makeup” not tiny the nuances that only a vintage buff will really understand, I’ll save that effect for another guitar. So it was back to the etching bath for another round. I ended up with the “wrapped in an army blanket and left in the corner of the garage behind old wooden shutters and forgotten for 50 years” look.

A few note on process: After re-etching I did a short rust bath (about 2 hrs) I ended buffing most of that effect off with the exception of the tuner covers, I liked the green cast they picked up. I rubbed black shoe polish into the chrome, it caught in the corners and pitted areas and added a slight layer of grime. Before I reassembly I hit the parts with a layer of clear coat.

For the pickup a used an exacto and carefully scuffed the edges and took a few small bites out the edges with end cutters and then back to the exacto to soften the cut edges. I also used a little brown oil pastel near the magnets to simulate rust.

A Quick Cut


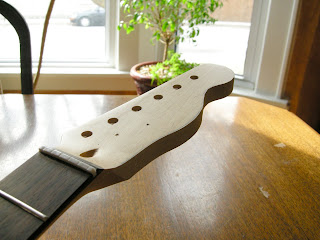
We had a wonderfully warm day so I ventured out to my shop and cut the headstock down to shape. I smoothed the profile with the new drum sander kit attached to my drill press. It worked nicely.

I shaped the headstock from a telecaster CAD drawing, the position of the tuners is a little off releative to a real tele but I think it will work fine on the Saga. I’ll post the file if anyone is interested.